
Please note this blog was originally published in summer 2020. All reopening dates refer to 2020 only.
PASS Ltd stocks a large selection of Hikvision Temperature-Screening Thermal Imaging Cameras including handheld, bullet and turret models, as well as combined access-control and temperature-screening solutions. These thermal imaging cameras and solutions are designed to detect elevated skin-surface temperature, a common indicator of fever which is a symptom of many illnesses including COVID-19 coronavirus.[1]
Quick Links
- Introduction
- Hikvision DS-2TP31B-3AUF Temperature-Screening Handheld Thermal Camera
- Hikvision Temperature-Screening Turret & Bullet Thermal Camera
- Hikvision Temperature-Screening Turret & Bullet Solutions & Pro Solutions Kit
- Hikvision DS-K5604A-3XF/V Plug & Play Minmoe Temperature-Screening & Face Recognition Terminal
- Hikvision Plug & Play Thermal Temperature-Screening Scanner with Metal Detector
- Further Information
Introduction
As England begins to emerge from lockdown with select schools, outdoor markets and car showrooms opening from the 1st June and non-essential shops allowed to re-open from the 15th June (provided they comply with the government’s social-distancing guidelines)[2], it is important to implement systems that are designed to protect staff, pupils and the public from further spread of infection. Hikvision’s Temperature-Screening Thermal Imaging Cameras offer a solution to this as they are able to detect persons with above-average skin temperature and will issue an alarm when abnormal skin temperatures are measured, enabling staff to act accordingly quickly.
It is important to note that the Hikvision Temperature-Screening Thermal Cameras cannot diagnose COVID-19, however, they can identify persons who may be required to self-isolate and undergo further medical screening. Refusing entry to individuals with elevated body temperature can help to prevent the potential spread of infection in public and professional places such as shops, stations, schools, and offices.
Hikvision’s Temperature-Screening Thermal Imaging Cameras are accurate, non-intrusive and easy to install. For a guide to setting up these cameras, please see the tutorial videos and steps below.
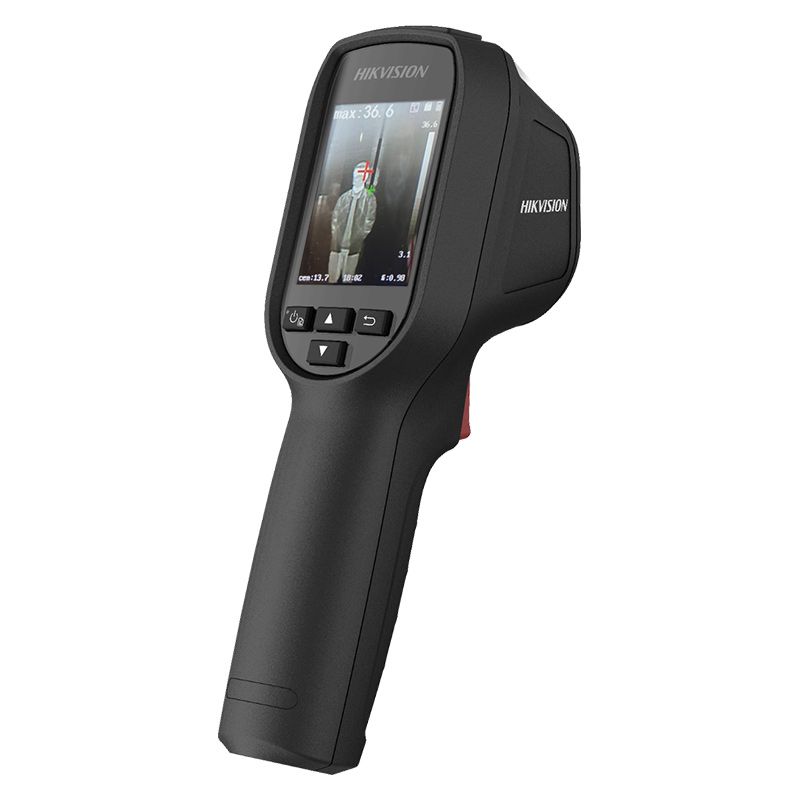
Hikvision DS-2TP31B-3AUF Temperature-Screening Handheld Thermal Camera
The Hikvision DS-2TP31B-3AUF Temperature-Screening Thermal Camera is an efficient, easy-to-use alternative to non-contact IR thermometers, please see the video below for further information.
It is Hikvision’s entry-level model and can scan one individual at a time. The Hikvision DS-2TP31B-3AUF Temperature-Screening Thermal Camera is ideal for those with only a few people to screen, e.g. small offices, shops, cafes, restaurants and schools.
How to Setup & Configure the Hikvision DS-2TP31B-3AUF Thermal Camera
It is recommended that the Hikvision DS-2TP31B-3AUF Temperature-Screening Thermal Camera is used in a windowless, indoor environment with a stable ambient temperature. It must be set up between 0.8m and 1.2m away from the target and should be switched on and left to warm up for at least 15 minutes before initial use to ensure the best accuracy.
How to Mount the Hikvision DS-2TP31B-3AUF Thermal Camera Onto a Tripod
- Attach a tripod adapter to the Hikvision handheld thermal camera
- Mount the Hikvision handheld thermal camera onto the tripod
How to Configure the Hikvision DS-2TP31B-3AUF Thermal Camera
- Press the Power/ Menu button to switch on the Hikvision handheld thermal camera
- Press the Power/ Menu button again to access the menu
- Select Emissivity
- Set Emissivity to 0.98, the emissivity of human skin
- Return to the menu
- Select Alarm Temp
- Set the Alarm Temp, for example, 37.5°C
- Set the distance using the actual distance between the Hikvision handheld thermal camera and the target, for instance, 1m
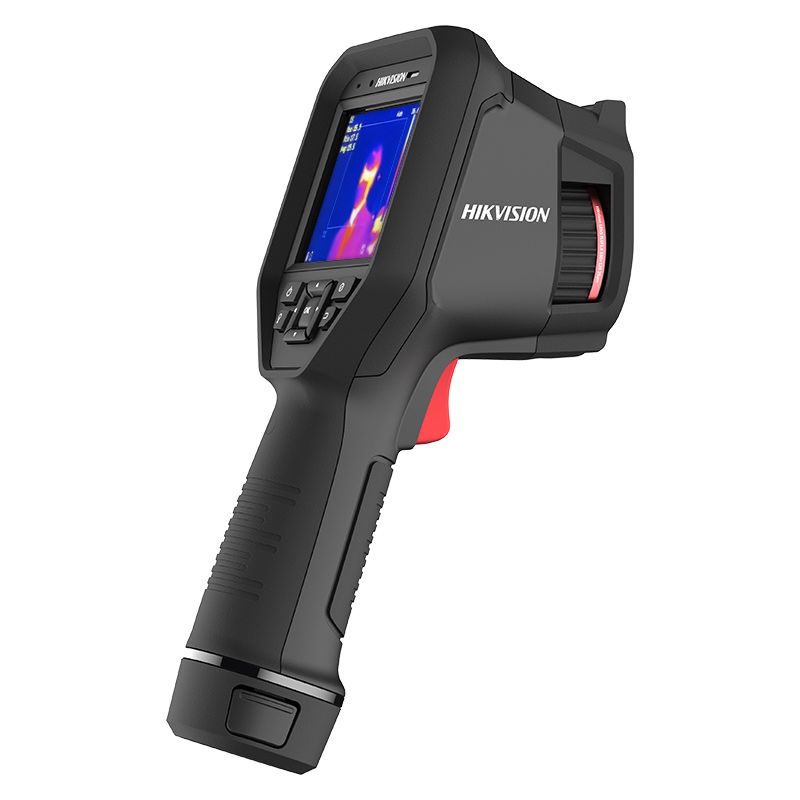
For further information regarding how to configure the Hikvision DS-2TP31B-3AUF Temperature-Screening Handheld Thermal Camera, please see the ‘How to Configure Temperature-Screening Handheld Thermal Cameras’ guide. This instruction manual also includes information regarding the configuration of Hikvision’s DS-2TP21B-6AVF/W Body Temperature Handheld Thermal Camera.
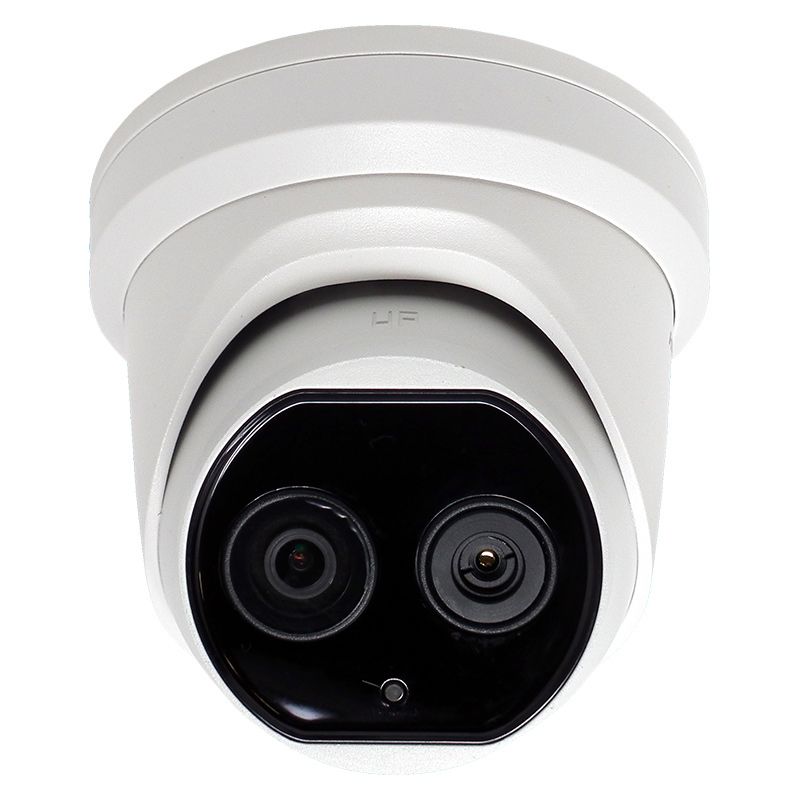
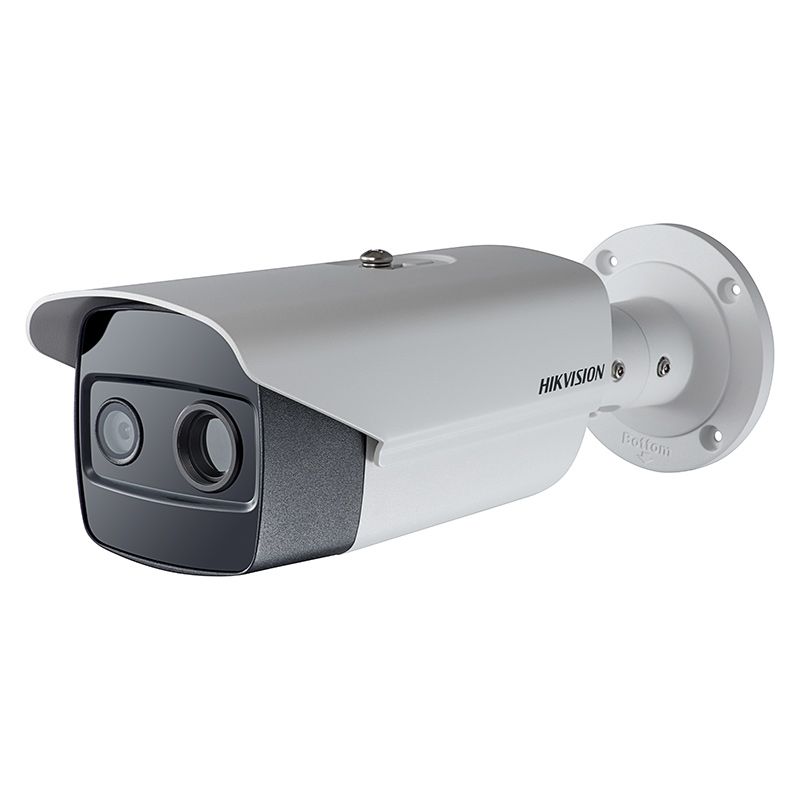
Hikvision Temperature-Screening Turret & Bullet Thermal Imaging Cameras
Hikvision’s Temperature-Screening Turret and Bullet Thermal Imaging Cameras are mounted temperature-scanning, visual-light, and infrared imagers designed for use in public and professional indoor environments such as offices, factories, concert/ sports venues, shops, schools, stations, and airports.
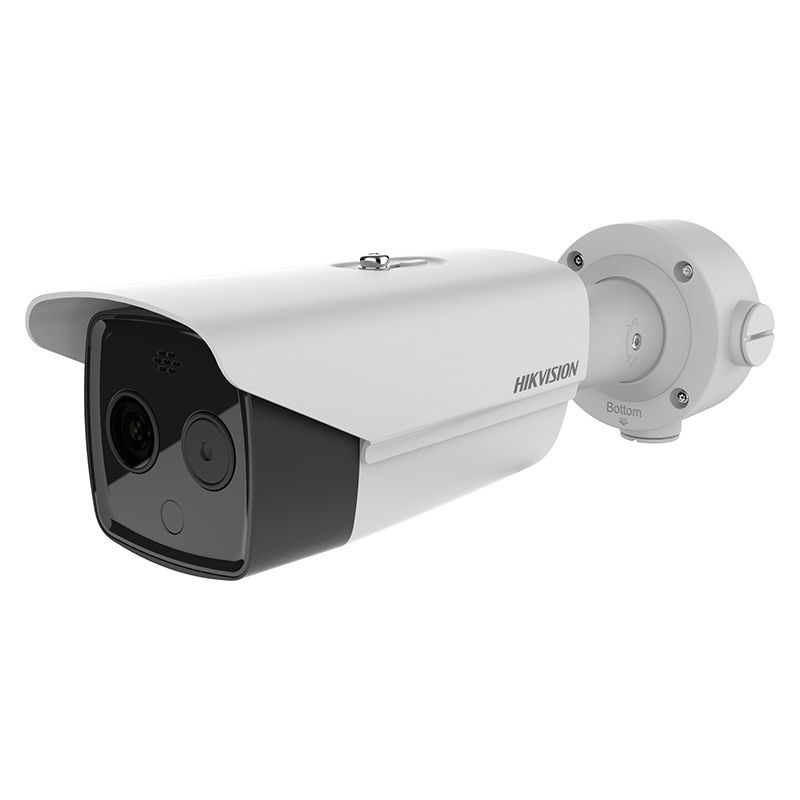
Hikvision’s turret cameras can be mounted on a ceiling or tripod, whereas Hikvision’s bullet cameras can be mounted on a wall or tripod. PASS Ltd stocks the following Hikvision Temperature-Screening Turret and Bullet Thermal Imaging Cameras:
- Hikvision DS-2TD1217B DeepinView Body Temp Turret Thermal Cameras (Low Resolution: 160 x 120px)
- Hikvision DS-2TD2617B DeepinView Body Temp Bullet Thermal Cameras (Low Resolution: 160 x 120px)
- Hikvision DS-2TD2636B DeepinView Body Temp Bullet Thermal Cameras (High Resolution: 384 x 288px)
These mounted thermal imaging cameras can be used to scan multiple people simultaneously, accurately, and in real-time. To enable these cameras to capture precise temperature measurements for each individual, please ensure that faces are within the camera’s frame and do not overlap. Hikvision’s Temperature-Screening Turret and Bullet Thermal Cameras should also be allowed to warm up for 90 minutes prior to initial use.
Hikvision's Temperature-Screening Turret and Bullet Thermal Imaging Cameras should be installed in a windowless indoor environment with a stable ambient temperature. Please consult the table below and the following pdfs for guidance pertaining to each camera’s recommended height and distance from the target and/or Hikvision DS-2TE127-G4A Black Body.
- How to Configure Temperature-Screening Thermal Cameras
- How to Configure Temperature-Screening Thermal Cameras with a Blackbody
| Model | Lens Size |
Recommended Distance Between Human & Camera |
Recommended Installation Height | Required Elevation Angle |
Recommended Distance between the Camera & the Black Body |
Black Body Installation Height |
| DS-2TD1217B | 3.1mm |
0.8-1.5m |
1.5m | ≤15° | ≤1.0m | 1.7m |
| 6.2mm | 1.5-3m | ≤2.0m | ||||
| DS-2TD2617B | 3.1mm | 0.8-1.5m | ≤1.0m | |||
| 6.2mm | 1.5-3m | ≤2.0m | ||||
| DS-2TD2636B | 9.7mm | 2-7m | 1.7-2.5m | ≤3.0m | ||
| 15mm | 2.5-9m | ≤5.0m |
How to Install Hikvision’s DS-2TD1217B Turret Thermal Cameras
How to Mount the Hikvision DS-2TD1217B Turret Thermal Camera Onto a Tripod
- Attach the Hikvision DS2908ZJ Tripod Adapter Plate
- Screw-in the tripod connector
- Mount the camera onto the tripod
- Connect the network cable
- If using a black body, mount the black body onto a second tripod (see the table and pdfs above for recommended distances and heights)
How to Install Hikvision’s DS-2TD2617B & DS-2TD2636B Bullet Thermal Cameras
How to Mount Hikvision’s DS-2TD2617B/ DS-2TD2636B Bullet Thermal Cameras Onto a Wall
- Stick the drill template onto the wall in the desired position (see the table and pdfs above for recommended heights and distances to the target/ black body)
- Drill holes through the template’s drill circles
- Place the junction box over the drill template and attach to the wall using screws
- Loop the camera’s safety rope around the hook in the junction box
- Connect the camera’s cables
- Fix the camera into position and secure by screwing it into the junction box
- Adjust the angle of the camera as required and screw into position
- If using a black body, install the black body at the specified height and distance from the camera (see the table and pdfs above for further information)
How to Configure Hikvision’s Turret & Bullet Thermal Cameras
- Open the Hikvision configuration software
- Click the ‘Configuration’ tab
- Select ‘Body Thermometry Configuration’
- Ensure the channel number is set to the visual camera channel (usually Camera 01)
- If necessary, clear the parameter settings
- Draw the temperature-detection area on the camera image
- Set the width of the farthest recognition frame
- Set the width of the nearest recognition frame
- Save
- Set the alarm temperature (e.g. 37.5°C)
- Set the pre-alarm temperature (e.g. 37°C)
- Save
How to Configure Hikvision’s Turret & Bullet Thermal Cameras with a Hikvision DS-2TE127-G4A Black Body
- Perform steps 1-12 above
- Switch to the thermal channel (usually Camera 02)
- If necessary, clear the parameter settings
- Select 'Draw Area'
- Place the green dot at the centre of the black body
- Save
For further information regarding the configuration of Hikvision’s DS-2TD1217B, DS-2TD2617B & DS-2TD2636B Temperature-Screening Turret and Bullet Thermal Imaging Cameras, please see the videos above.
Hikvision Temperature-Screening Turret & Bullet Solutions & Pro Solutions Kits
PASS Ltd stocks a selection of exclusive Hikvision Temperature-Screening Turret and Bullet Thermal Camera Kits, including:
- Hikvision DS-2TD1217B Low-Res Body Temp Thermal Cameras – Solutions Kit
- Hikvision DS-2TD1217B Low-Res Body Temp Thermal Cameras – Pro Solutions Kit
- Hikvision DS-2TD2617B Low-Res Body Temp Thermal Cameras – Solutions Kit
- Hikvision DS-2TD2617B Low-Res Body Temp Thermal Cameras – Pro Solutions Kit
- Hikvision DS-2TD2636B Hi-Res Body Temp Thermal Cameras – Solutions Kit
- Hikvision DS-2TD2636B Hi-Res Body Temp Thermal Cameras – Pro Solutions Kit
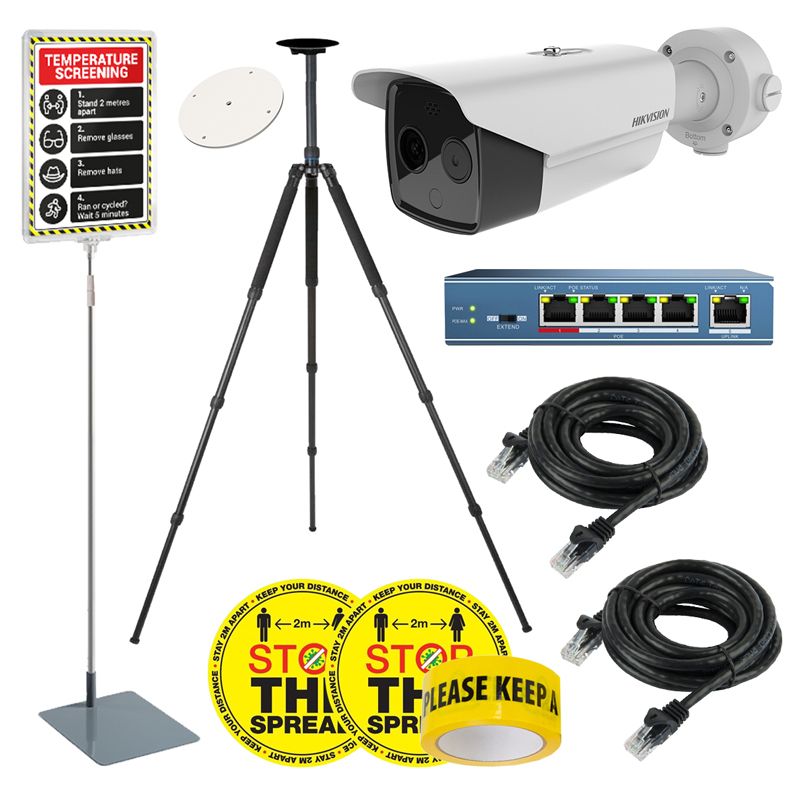
How to Setup Hikvision Turret/ Bullet Thermal Camera Solutions Kits
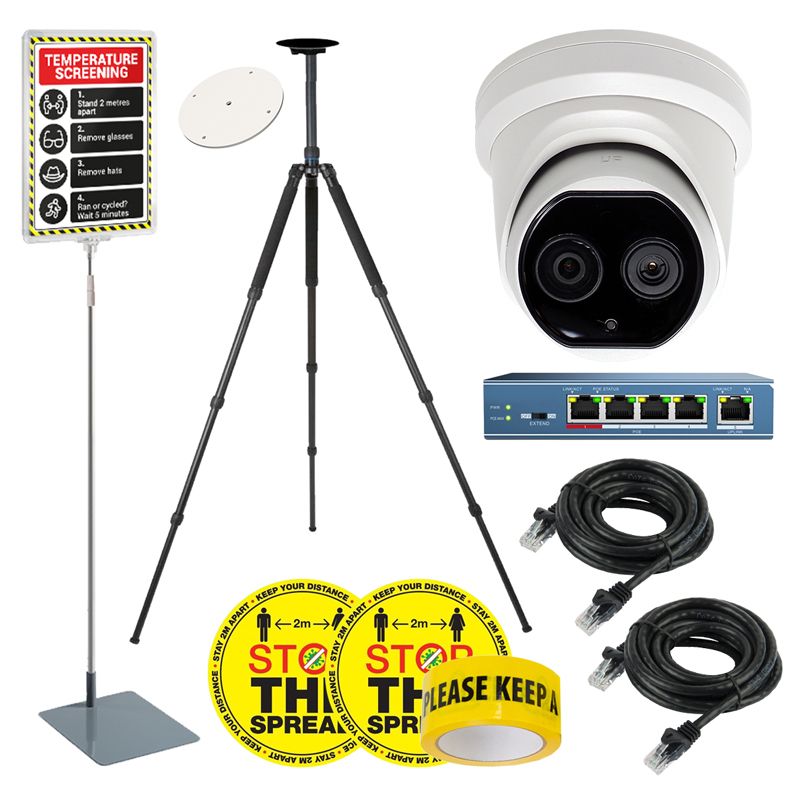
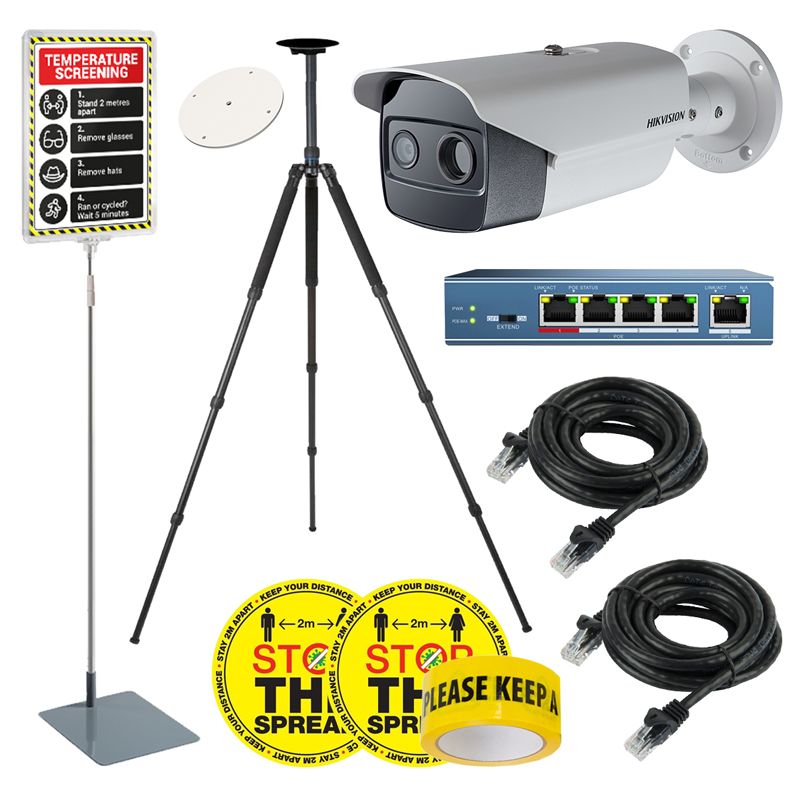
The Hikvision Temperature-Screening Turret/ Bullet Thermal Camera Solutions Kits include the following:
- 1x Hikvision Temperature-Screening Turret OR Bullet Thermal Camera of your choice
- 1x Hikvision DS-2907ZJ Tripod
- 1x Hikvision Tripod Adapter
- 1x Hikvision DS-3E0109P-E 4-Port 100Mbps PoE Switch
- 2x PoE cables
- FREE Hikvision iVMS-4200 Client Software
- Social Distancing Signage
To set up these kits, please follow these steps:
- Mount the Hikvision Temperature-Screening Thermal Camera onto the included tripod using the tripod adapter
- Connect the PoE cable to the 4-port PoE switch
- Configure the camera and PoE switch to your laptop’s/ PC’s IP address
- Download the FREE Hikvision iVMS-4200 Client Software
- Follow the configuration steps above, and detailed in the videos and ‘How To Configure Temperature-Screening Thermal Cameras’ pdf guide
- Begin temperature screening
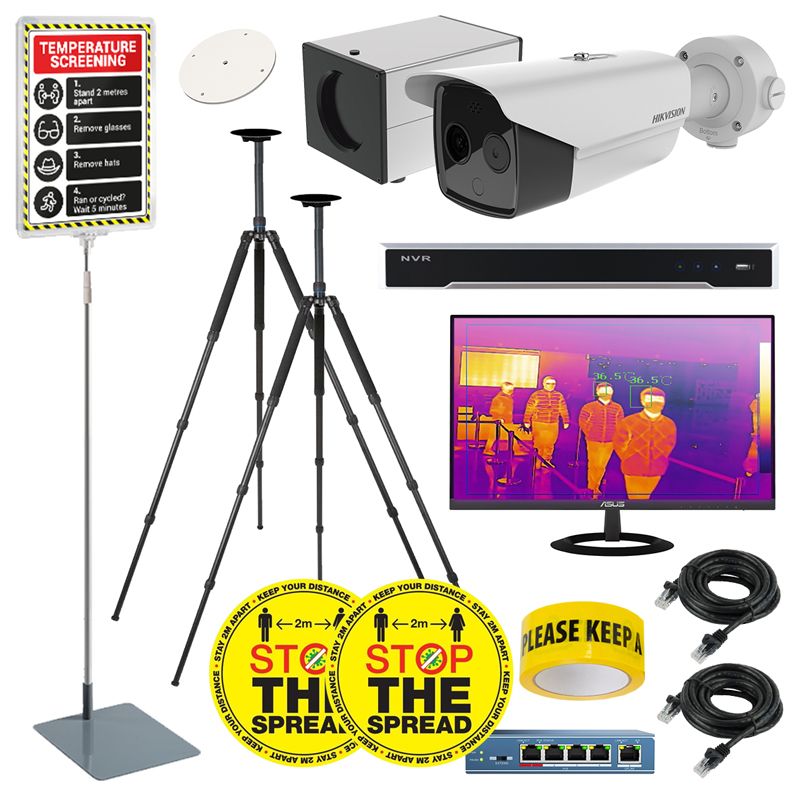
How to Setup Hikvision Temperature-Screening Turret/ Bullet Thermal Camera Pro Solutions Kits
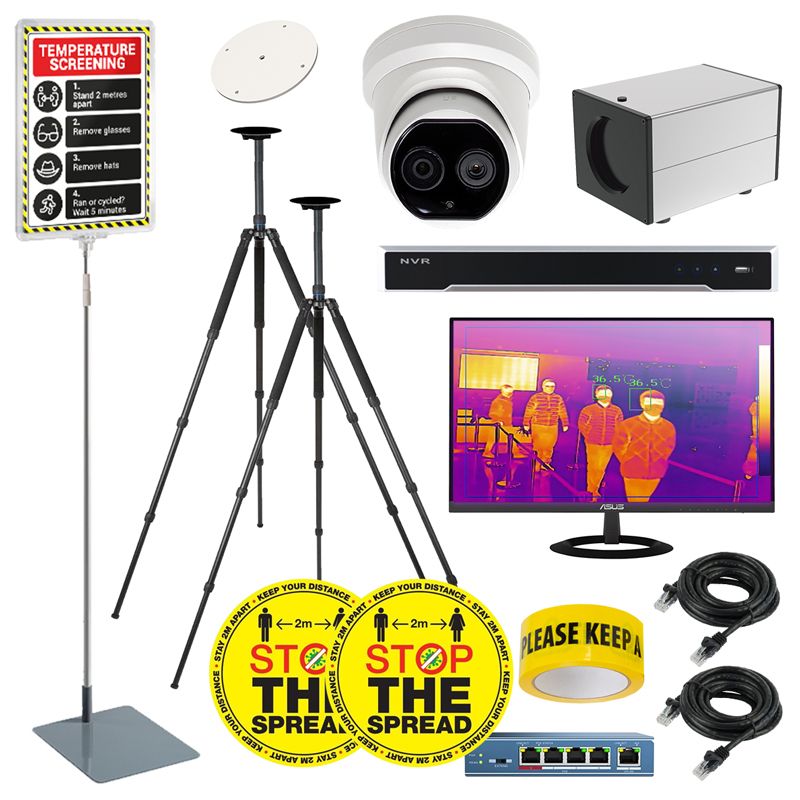
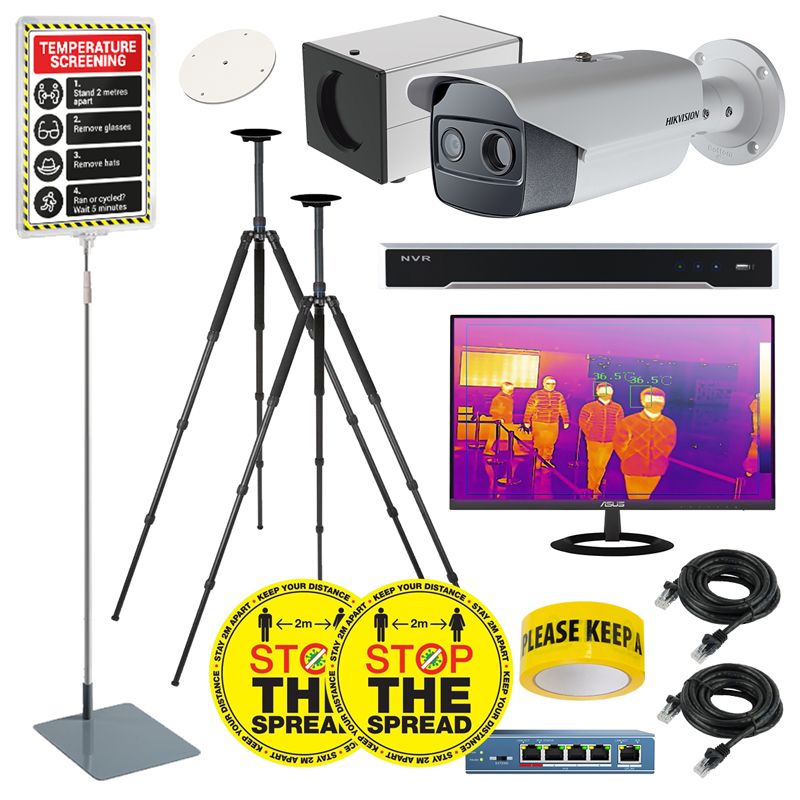
The Hikvision Temperature-Screening Turret/ Bullet Thermal Camera Pro Solutions Kits include the following:
- 1x Hikvision Temperature-Screening Turret OR Bullet Thermal Camera of your choice
- 1x Hikvision DS-2TE127-G4A Black Body
- 2x Hikvision DS-2907ZJ Tripods
- 1x Hikvision Tripod Adapter
- 1x Hikvision DS-3E0109P-E 4-Port 100Mbps PoE Switch
- 2x PoE cables
- Hikvision DS-D5022FN 21.5” Monitor
- Hikvision DS-7608NI-12/8P 8-Channel NVR
- FREE Hikvision iVMS-4200 Client Software
- Social Distancing Signage
Please follow these steps to set up the Hikvision Temperature-Screening Turret/ Bullet Thermal Camera Pro Solutions Kits:
- Mount the Hikvision Temperature-Screening Thermal Camera onto one of the included tripods
- Mount the black body onto the other tripod (ensure it is placed at the right height and distance for your camera, please see the table and pdfs above for further details)
- Connect the PoE cable to the 4-port PoE switch
- Configure the camera, PoE switch and NVR (which enables recording and allows footage to be played back and analysed at any time) to your laptop’s/ PC’s IP address
- Download the FREE Hikvision iVMS-4200 Client Software
- Follow the configuration steps above, and detailed in the videos and ‘How to Configure Thermal Cameras with a Black Body’ pdf guide
- Connect the monitor to the video-out cable to view real-time thermal footage on the screen
- Begin temperature screening
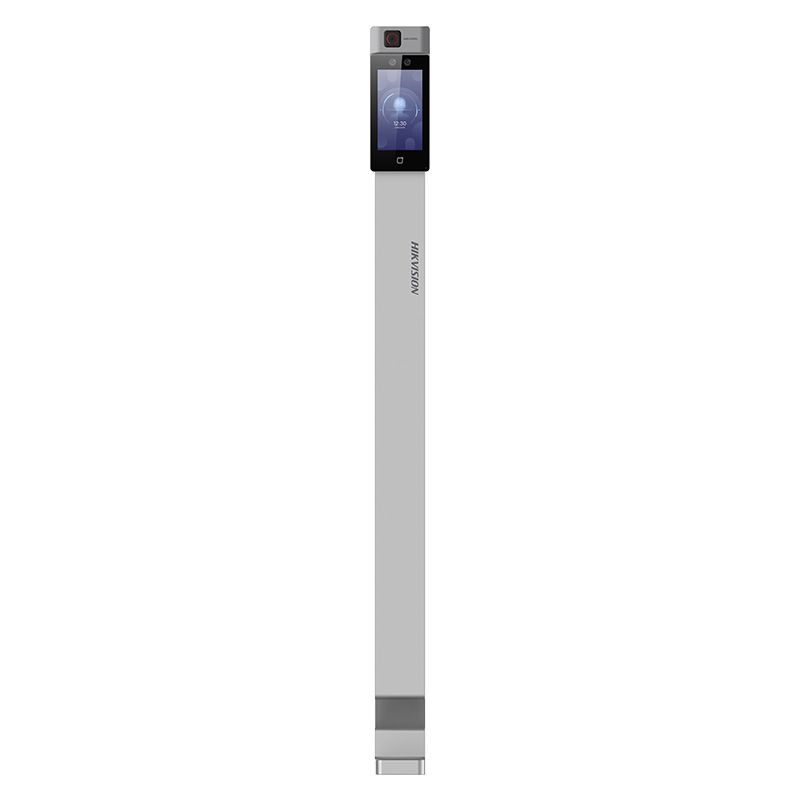
Hikvision DS-K5604A-3XF/V Plug & Play MinMoe Temperature-Screening & Face Recognition Terminal
The Hikvision DS-K5604A-3XF/V Plug & Play MinMoe Temperature-Screening & Face Recognition Terminal features an integrated stand and is supplied ready-assembled. It is a combined access control and temperature-screening instrument suitable for installation in building entrances and lobbies, schools, campuses, businesses, and factories.
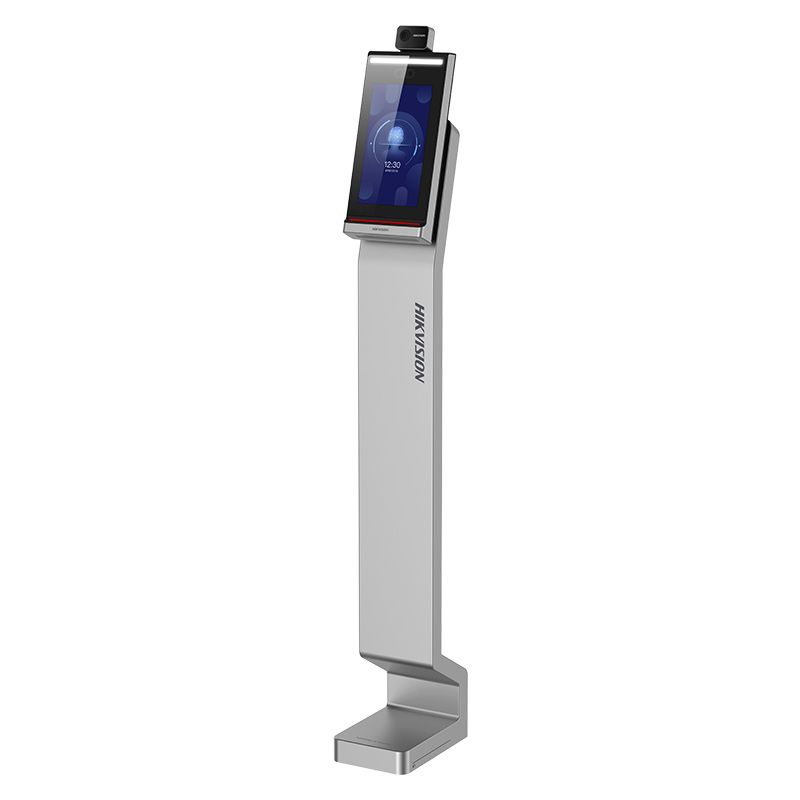
How to Setup the Hikvision DS-K5604A-3XF/V Terminal
The Hikvision DS-K5604A-3XF/V Plug & Play MinMoe Temperature-Screening & Face Recognition Terminal is specifically designed to enable fast deployment and can be set up within five minutes as it does not require assembly, installation or configuration, and is completely free of wiring. Please see the tutorial video and steps below for instructions on how to set up the Hikvision DS-K5604A-3XF/V Plug & Play MinMoe Temperature-Screening & Face Recognition Terminal.
- Unbox the Hikvision DS-K5604A-3XF/V Plug & Play MinMoe Temperature-Screening & Face Recognition Terminal
- Plug it in
- Power it up
- Begin screening
Pass Ltd also stocks Hikvision’s DS-K1T671TM Face Recognition & Temperature-Screening Terminal with Stand which can be used in the same capacity as the Hikvision DS-K5604A-3XF/V Plug & Play MinMoe Temperature-Screening & Face Recognition Terminal. However, it also includes a built-in card reader. Please see the video below for an overview of the Hikvision DS-K1T671TM Face Recognition & Temperature-Screening Terminal.
Hikvision Plug & Play Thermal Temperature-Screening Scanner with Metal Detector
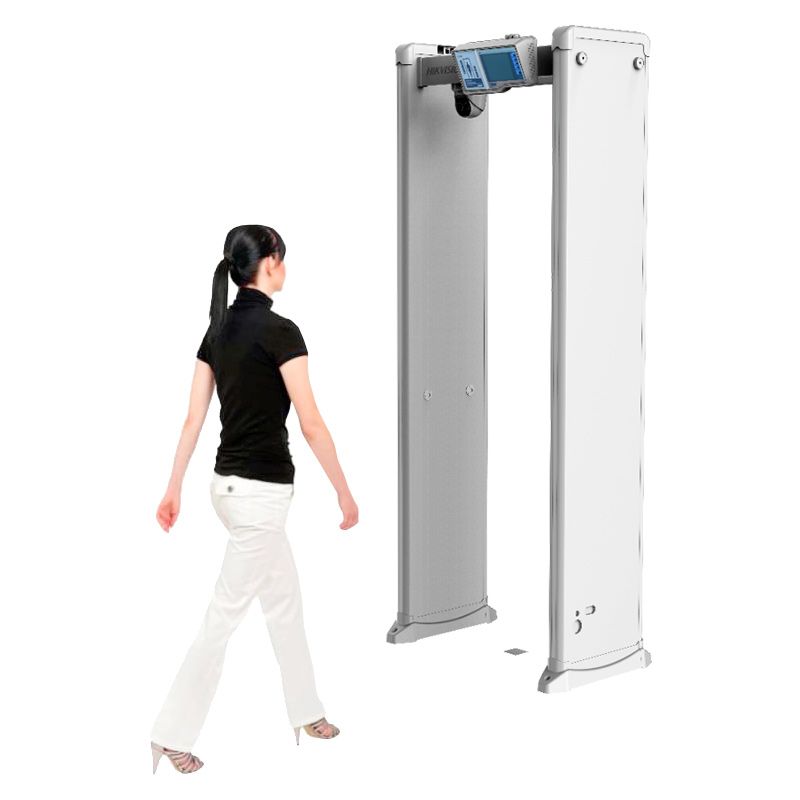
Finally, the Hikvision’s Plug & Play Thermal Temperature Screening Scanner with Metal Detector is an all-in-one metal detecting door and thermal camera suitable for body-temperature screening and locating metal on an individual. It is ideal for installation in airports, stations, concert/sports venues, and schools and, like the Hikvision DS-K5604A-3XF/V Plug & Play MinMoe Temperature-Screening & Face Recognition Terminal, has been designed for fast deployment. Please see the video below for an introduction to the Hikvision Plug & Play Thermal Temperature Screening Scanner with Metal Detector.
Further Information
Please follow this link for further information regarding our range of Hikvision Temperature-Screening Thermal Cameras and Solutions. Alternatively, please contact us on 01642 931 329 or via our online form.
[1] NHS, Symptoms and What to Do: Coronavirus (COVID-19), last accessed 03 June 2020 <https://www.nhs.uk/conditions/coronavirus-covid-19/symptoms/>
[2] BBC News, Coronavirus: All non-essential shops to reopen from the 15 June – PM, last accessed 27 May 2020 < https://www.bbc.co.uk/news/uk-52801727>